How to use AI Influencer Generator
Add reference photos, or start fresh
Under "Reference photos of your influencer (optional)", add up to 4 sharp, front-facing photos in good light. All should show the same face. Once photos are added, check the consent box. No photos yet? Run the "Studio portrait" scene first and reuse the best result.
Describe the persona once
In "Describe your influencer (optional)", give a name, age, look and one or two details that never change, e.g. "Noor, 31, travel creator, short dark curls, small silver nose ring". "Build the persona (optional)" covers age, hair, niche, framing and camera; "Persona ideas" offers ready examples. Keep the text identical for every post.
Pick the scene, model and format
Choose one of the 12 places in "Pick a scene". Then pick a "Format": 4:5 for feeds, 9:16 for Stories and Reels. In "Model", Nano Banana Pro suits shots where realism decides, and FLUX 2 [max] suits everyday photoreal images. GPT Image 2 (medium) is less photoreal and supports only 1:1, 3:2 and 2:3.
Check the face, then lock it in
Press "Create the post" and compare the face, skin tone and hairline with your references. If the face drifts, upload 2 to 4 photos of the same face. Keep the description word for word and change only the scene. Save the best portrait as the reference for your next posts.
12 scenes for a believable feed
Each scene keeps your influencer's face and changes the place, the light and the pose. Start with the studio portrait: it makes the cleanest reference for every post that follows.
Mirror selfie
The classic outfit post: phone in hand, bright bedroom, the whole look in frame.
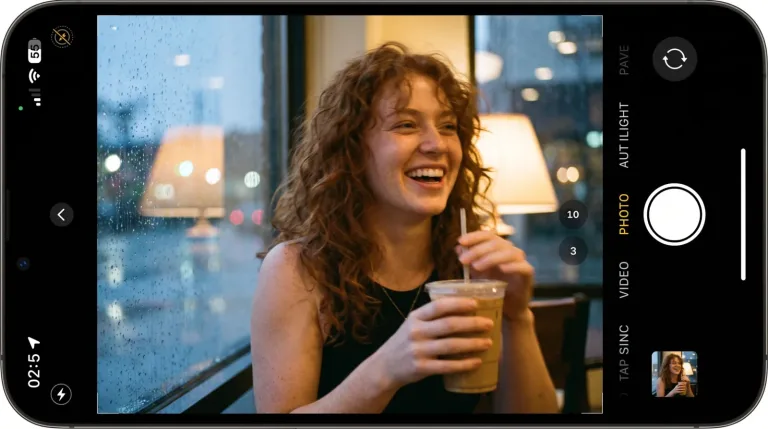
Morning cafe
A relaxed lifestyle shot with a cup of coffee, soft window light and a street blurred behind.
Gym session
Fitness content with real sweat and a natural expression, mirrors and weights out of focus.
Street style
A mid-step walk toward the camera at golden hour, the shot fashion accounts post every week.
Travel viewpoint
Wind in the hair at a scenic view, the kind of post that makes followers ask where it is.
Reference portrait
Front-facing, even light, plain backdrop. Generate this first and reuse it as the reference photo.
Sponsored post
Your influencer holds an unbranded product toward the camera, with the product in sharp focus.
Beach at sunset
Warm backlight, linen in the breeze and bare feet on wet sand.
Night out
Direct flash, city lights behind and a candid laugh, the look of a real party photo.
Cozy at home
A slow weekend shot on the sofa with a book and warm lamp light.
Work from home
A tidy desk, an open laptop and coffee, for productivity and tech content.
Cooking at home
Chopping fresh vegetables in a bright kitchen, for food and recipe accounts.
What a real job costs here
The cheapest model on this page charges 14 credits and the most expensive 38 credits. At the best pack rate that is about $0.1490 up to $0.4044.
| Pack | Credits | Runs with Nano Banana Pro |
|---|---|---|
| $9 | 750 | 19 |
| $19 | 1,650 | 43 |
| $39 | 3,500 | 92 |
| $79 | 7,300 | 192 |
| $149 | 14,000 | 368 |
Choosing between the models on this page
GPT Image 2 (medium): Posters, menus, interfaces and any image with readable text. Typography that stays readable at small sizes. Watch out for: not the most photoreal option.
FLUX 2 [max]: Everyday photoreal image generation and iteration. Photorealistic default. Watch out for: text rendering is weaker than GPT Image 2.
GPT Image 2.5: Edits and product shots where the subject must stay recognizable. Sharper detail and more natural light. Watch out for: small, dense text can still break.
Nano Banana Pro: Hero images where realism decides the result. Photoreal skin and texture. Watch out for: higher rate than everyday image models.
An influencer is the same person in every post
A single good portrait is easy. The hard part is a fifty-post feed where the same person works out, travels and holds a product. That consistency is what makes a virtual influencer believable. This tool is built around it. You design the face once and reuse it as a reference in every scene.
Step 1: design the persona
Describe who your influencer is in a few lines. Or click through the persona builder: look, age, hair and niche. Give the persona one or two small, constant details, such as freckles or a thin gold chain. Then run the studio portrait scene. A front-facing photo in even light is the reference you will use from now on.
Step 2: reuse the face in every scene
Upload your best portrait, or up to four photos of the same face, as references. Every scene keeps the face, skin tone and hair from those photos. Only the place, the light, the outfit and the pose change. Keep the persona description the same between runs and change only the scene.
Step 3: pick the niche, the framing and the format
The niche sets the styling: fitness, fashion, beauty, travel, food, tech, gaming or wellness. For framing, pick a selfie, close-up, waist-up or full-body shot, or a candid photo taken by a friend. Choose 4:5 for the feed and 9:16 for Stories, Reels and TikTok. Use 1:1 for profile grids and 16:9 for YouTube covers. The FAQ below lists which model supports which format.
Bring the persona to life
Still photos are half of an account. Animate a photo into a short clip, or make the influencer talk with a script. Motion control copies a trending dance from any reference video, and motion transfer recasts an existing clip. Each next step starts from the photo you just made.
Label AI content and respect real people
Say that the account and its posts are AI-generated, especially in paid partnerships. Advertising rules in the EU, the UK and the US treat an undisclosed synthetic endorser as misleading. Do not recreate real people or celebrities, and upload photos of a real person only with their consent.
Frequently asked questions
How do I keep the same face in every photo?
Generate a clean studio portrait first and upload it as a reference for every run after that. Keep the persona description identical and change only the scene. Two to four reference photos of the same face work even better than one.
Can I upload my own photos?
Yes, photos of yourself or of someone who agreed to it. The consent box appears as soon as you add reference photos, and every run with them requires it.
Which format should I use?
4:5 for Instagram feed posts, 9:16 for Stories, Reels and TikTok. 1:1 for profile grids and 16:9 for YouTube thumbnails and covers. GPT Image 2 (medium) supports only 1:1, 3:2 and 2:3. For 4:5, 9:16 or 16:9, pick Nano Banana Pro or FLUX 2 [max].
Can my AI influencer talk and move?
Yes. After a photo is ready, use the next steps under the result. They open the talking photo, image to video, motion control and motion transfer tools with that photo.
Do I have to say the influencer is AI?
In most markets, yes, and it is good practice everywhere. Mark the profile and paid posts as AI-generated so followers and brands know what they are seeing.
Which model should I pick?
Nano Banana Pro holds the same face across references best. GPT Image 2 costs less per image, and FLUX 2 [max] gives a different photographic character. The price of each shows before you generate.
